Apple Roasted Honey Drumsticks

IMG_20130912_140752

After the less than stellar outcome with the Butterflied Turkey I wanted to do something easy with this cook. So I figured I would go back to a basic, drumsticks. I recently bought a new grill cookbook, Myron Mixon’s Everyday Barbeque and was dying to try the brine recipe in it.

Lessons Learned:

  1. These could have been fine smoke roasted in the 325-350 range. They didn’t need to have the slow and low treatment that a roast would need.
  2. A continuous supply of Apple chips was the perfect amount of smoke.

IMG_20130912_090133IMG_20130912_090125

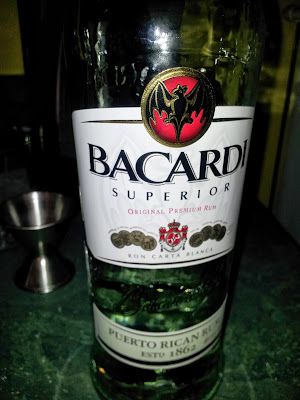
Brine: I used Myron Mixon’s apple juice brine, and brined the drumsticks overnight.

Brine Recipe: (enough for 2 1 gallon freezer bags)
  • 6 cups apple juice
  • 2 cups apple cider vinegar
  • 1.5 cups sugar
  • 1.5 cups kosher salt

IMG_20130912_090430

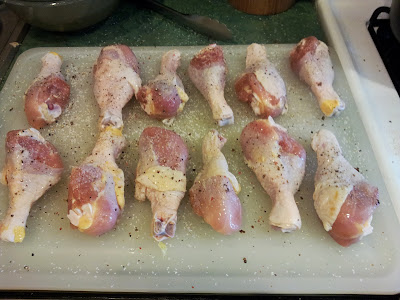
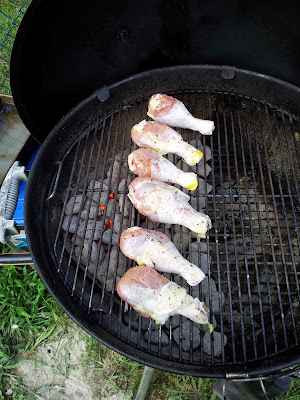
Drumsticks fresh out of the brine and being toweled off…

IMG_20130912_091523

My favorite part, applying the rub…

Rub Recipe:
  • 1 cp. light brown sugar (packed)
  • 2 tbsp. chili powder
  • 2 tbsp. mustard powder
  • 2 tbsp. onion powder
  • 2 tbsp. garlic powder
  • 2 tsp. cayenne pepper
  • 2 tbsp. Kosher salt
  • 2 tbsp. black pepper

IMG_20130912_091816

Drumsticks all rubbed up and resting. My kids, who don’t like anything with spice or flavor, actually requested some “blank” drumsticks. No rub, just smoke and sauce!

IMG_20130912_102703

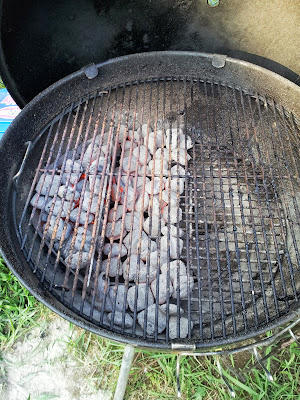
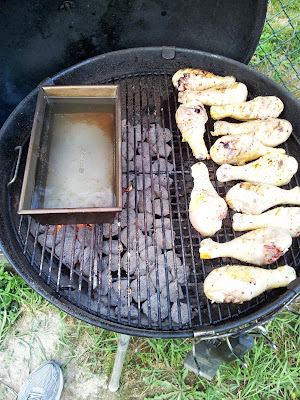
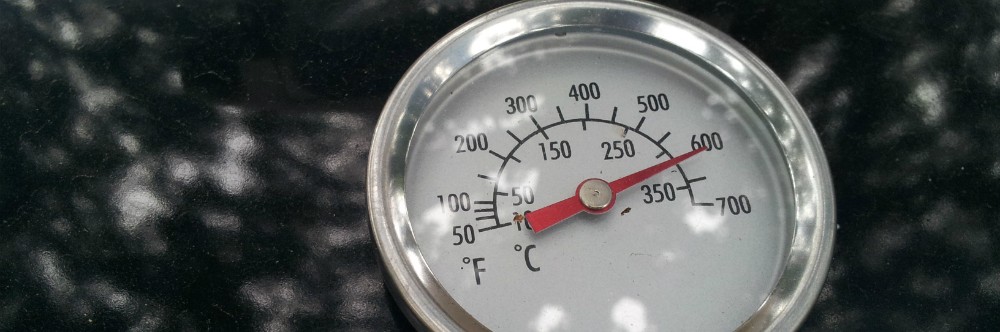
For this cook I went for a slow and low setup with about 3 hours of fuel. I have a continuous ring of Apple chips on top of the coals. This should get me a nice steady stream of smoke but not too much to overpower the meat with a sooty taste.

IMG_20130912_130329

For the sauce I went with a straight 2:1 mixture of Sweet Baby Ray’s and Raw Honey. Heated and mixed together. I mixed this about 2 hours before using.

IMG_20130912_133545

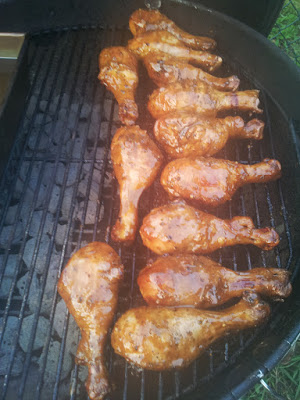
This is what the Chicken looked at the 2 hour mark. You can see that the ring of coals and chips have burned through half of the fuel. The grill was in the solid 225-250 range. A bit lower than necessary for chicken. But since this was going to be a long smoke I had plenty of time and fuel.

IMG_20130912_133641

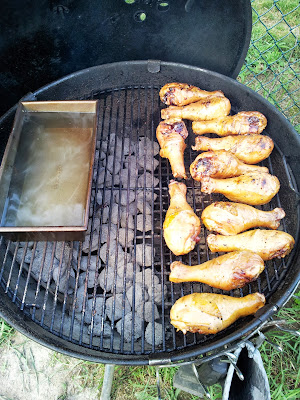
I went ahead and added some sauce on the drumsticks. And left them on for about 30 minutes more. I ended up not having to go the entire 3 hours at all. Temps on the drumsticks at saucing were at 160.

IMG_20130912_140752

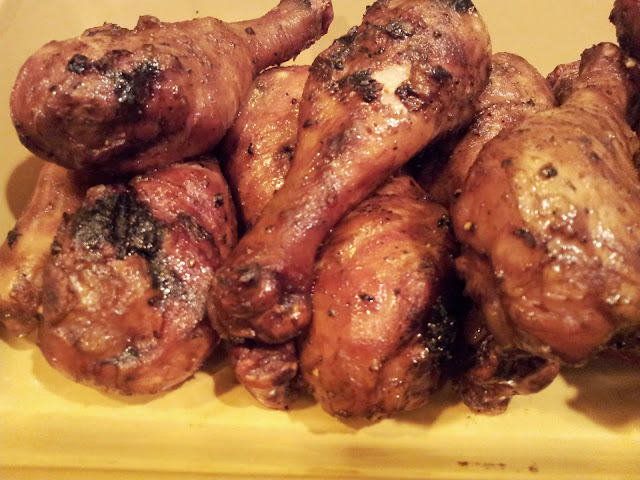
Close up after applying sauce:

IMG_20130912_193055

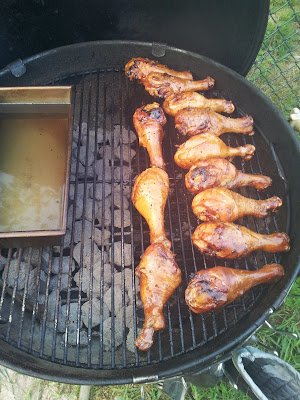
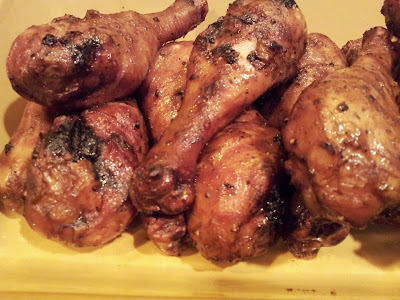
I pulled the chicken off, gave another coating of sauce, and covered with foil and let sit for 30 minutes. These were so good, and fall off the bone soft! A couple didn’t even make it to the photo shoot. Sacrificed to Cook’s Privilege! The apple wood left a mild taste, more subtle than cherry. It was a great compliment to the brine!

Hong Kong Chicken

I picked this recipe from Weber’s Charcoal Grilling: The Art of Cooking with Live Fire last week, because I wanted something on the grill, but didn’t feel like going out to the store to pick anything up. So I defrosted some chicken legs the night before and set to preparing this. This is a relatively quick recipe to prepare for. Total time from unwrapping thawed legs to plate was about 5.5 hours. The majority of that time (4 hours) was the brine time for the chicken legs.

Let’s move on to the cook!

Dry Ingredients Wet Ingredients

Seasoning Blend:

2 tsp. Kosher salt

1 tsp. fresh ground black pepper

Brine:
2 qts water
1/2 cp. Kosher salt
1/2 cp. sugar

Grill Sauce:
2 tbsp. Hoisin Sauce
2 tbsp. Cider Vinegar
1 tbsp. Dijon mustard
2 tsp. Soy sauce
2 tsp. grape seed oil
1/4 tsp. fresh ground black pepper

This cook, is brought to you by Bacardi White

Step 1: Brine the chicken for 4 hours in the brine mixture and place in the fridge.

Step 2: Remove chicken from brine, rinse off, and pat dry with paper towels. Then liberally season with seasoning blend.

Step 3:

Set up a medium heat grill. I used 3/4 of a Weber chimney full of Kingsford coals. I filled one Weber basket with lit coals, and then poured the rest to cover half the charcoal grate. (see below)

Step 4: Place chicken directly over coals for a 5 minute char to get the drumsticks started. (2.5 minutes on one side, then 2.5 minutes on the other)

Step 6: Move to cool side of grill

Step 7: After 20 minutes

Step 8: After 40 minutes

Step 9: At 40 minutes, apply sauce to chicken and put the lid to cook for an additional 20 minutes

Step 10: Last 20 minutes

Step 11: Pull and let rest for 15 minutes. I made some sautéed vegetables and brown rice with a Moscow Mule. Excellent! Chicken had a bit of heat to it, a little too much for the kids, but me and the wife loved it!

Blackened Tilapia

P1010530

I love Cajun food, particularly Blackened Redfish, but since I didn’t have any Redfish, I substituted Tilapia. I made these the same time as I made my Cedar Planked Lemon-Pepper Tilapia. As before, I had this bag of Tilapia just sitting in the freezer, so I figured I’d do something with it.

The raw materials…

I split the bag in half. I blackened 6 fillets and cedar planked the other 6.

P1010498

I used a variation of a recipe from Terry Thompson’s The New Cajun-Creole Cooking cookbook. Here is the recipe I used to “paint” the fillets.

Dry Ingredients “Wet Ingredients”
  • 1 tbsp. Paprika
  • 1.5 tsp. cayenne pepper
  • 1 tsp. kosher salt
  • 2 tsp. black pepper
  • 1 tbsp. dried thyme
  • 6 Tilapia fillets
  • 2 cups butter melted
  • 1/2 cup lemon juice (fresh squeezed, never the stuff from the plastic lemons, EVER!)

I melted the butter in the microwave on low heat, then stirred in all the rest of the ingredients and allowed the mixture to cool. Once cool I painted each fillet on both sides with the mixture and let it marinate for about 3 hours.

Painting the fillets…

P1010514

While the fillets were marinating I started a full chimney of Kingsford briquettes. I used half of the lit coals to fill a Weber basket, and the rest I spread in a single layer to toast cedar plank for the other fish I cooked.

Lighting the coals…

P1010492

Laying ‘em down…

I let the cast iron griddle heat for about 15 minutes over the weber basket. You’ll know when your griddle/skillet is ready, because the cast iron will get a bit of a gray haze on it.

As soon as you put the fillets on they will produce prodigious amounts of smoke. They will sear and begin to cook immediately. Be careful that the spits and sputters from the fish and butter don’t burn you. You may be tempted to lift the fillets or move them. DON’T! You will touch this only once, when you flip it over. It took these about 3 minutes per side.

P1010525

The finished product…

P1010530

These tasted as good as they look. One fillet never made it in the house. I brought out a fork and plate and ate it there at the grill.

Lessons Learned/For next time…

The Tilapia was a little too tender for this recipe. A couple of fillets got mangled in the turning. In addition, the weather was cold that day so I had to watch the heat on the second round of fillets. I can’t wait to try this with some Redfish or Red Snapper next time!

Crunchy Grilled Chicken Breasts

IMG_20121007_140655

Tell me these don’t look good, I dare you! Just kidding. Smile

It is possible to make crunchy and grilled chicken breast at the same time on the grill. This isn’t KFC styled crunchy but there’s a good bit of attitude in each bite of these. This cook is a variation of a recipe in  Bill and Cheryl Jamison’s Chicken on the Grill: 100 Surefire Ways to Grill Perfect Chicken Every Time

Today in NE Philly

P1010414

As you can see the sky was grey and drizzly, a dreary Sunday afternoon brewing up. Plus, the weather was under 60 degrees so you know what that means, Summer has officially left the building. Doesn’t mean I can’t grill though.

Today’s cast:

P1010405

Dry Ingredients Wet Ingredients (Basting blend)
  • 4 tbsp raw rice (ground to consistency of bread crumbs)
  • 2 tbsp paprika
  • 2 tsp kosher salt
  • 1 tsp brown sugar (always homemade!)
  • 1 tsp onion powder
  • 1/4 cup EVOO
  • 1/4 cup unsalted butter melted
  • 1/4 cup roughly chopped fresh herbs (Basil, Oregano, Marjoram, etc)
  • 5 cloves crushed garlic

Grinding the Rice

P1010406

At first I tried my tried and true Cuisinart food processor. But after a minute or so of pulsing this is what the rice looked like. I was not looking forward to digging out my marble mortar and pestle. So I got down my Oster blender. Here’s a shot of it grinding away. Look at that rice fly!

P1010407

Ground rice anyone? As you can see it is ground to about the texture of bread crumbs. The blender really made short work of the rice. If I had left it on for much longer I probably would have had rice flour.

P1010408

The resultant rub:

P1010409

It’s Hammer Time! I hate pounding chicken breasts. One tip I’ve found is to use a freezer bag for the chicken breasts and whack them while inside. The freezer bag is a lot easier to get chicken in and out of then Saran Wrap.

P1010410

…and Rubbin’ son, is Racing!

P1010413

I’ve given each breast a liberal coating of the rub. They will go in the fridge for 3 –4 hours as I get some other things done today.

4 Hours later…

P1010415

I’ve got my trusted Half-Moon Griddle on my Weber One-Touch-Gold. I only lit a 3/4 full chimney. Knowing how fast breasts cooks I didn’t need a full chimney today. Plus I wasn’t going to cook anything else after this. Underneath the griddle is a weber basket full of coals. The rest of the chimney was spread out halfway across the charcoal grate.

3 minutes per side…

P1010416

I cooked each breast three minutes per side. As soon as I flipped, I brushed on the basting marinade on top of the sizzling meat. As soon as 6 minutes had passed I moved the breasts off to the cool side of the grill as I cooked the other breasts.

Basting Beauties…

P1010417

Here you can see my phone playing double duty as a timer for the breasts.  I can get a bit anal about these things sometimes. The basil baste is in the center of the photo.

A group shot…

P1010418

Last of the chicken breasts going on the griddle. You can see some of the herbs on some of the other pieces. One of these breasts never made if off the grill and into the house. He sacrificed himself by jumping straight into my mouth!

The heat is on…

P1010419

Once all the breasts had their 6 minutes of fun, they went back over the hot coals for 3 more minutes. I basted and flipped after about a minute each side. The smell of the baste on top of the sizzling meat chased the Autumn away.

The Money Shot…

IMG_20121007_140702

The chicken came out great. The ground rice in the rub was a nice surprise. It gave the breasts a bit of a bite as you bit into them. Almost like coarse sea salt but without the salty taste. Next time I make this rub I make increase the amount of ground rice a bit. But overall I’m very satisfied with this outing.

White Barbeque Sauce

I’ve been wanting to try my hand at “White Barbeque Sauce” ever since I first saw it in featured in Jamie Purviance’s cookbook Charcoal Grilling: the Art of Cooking with Live Fire. The recipe is pretty straight forward. And of course I’ve modified it a bit. Here are the players:

The Dry The Wet
  • 1 tbsp. sugar
  • 1 tsp. Sea Salt
  • 1 tsp. coarsely ground black pepper
  • Large Yellow Onion
  • 2 garlic cloves
  • 4 tbsp. unsalted butter
  • 1/2 cup dry white wine
  • 1 cup Miracle Whip Dressing
  • 1/3 cup loosely packed, rough chop basil
  • 1/4 cup Apple Cider vinegar
  • 2 tbsp. lemon juice
  • 1 tbsp. Dijon mustard
  • 1/2 tsp. hot sauce

IMG_20120930_151526

Step 1: Here I’ve minced the garlic & onion until they were basically a paste. I ended up straining this mixture as there seemed to be a lot of liquid left over. Since I was going to be sautéing this mixture I didn’t want it too wet.

IMG_20120930_152240

Step 2: In this shot, I’ve melted the butter and have begun to cook the onion mixture. It took about 4 minutes. I cooked it until it was just starting to turn opaque; stirring occasionally.

IMG_20120930_154609

Step 3: Next I added in the white wine and cooked until half of the liquid evaporated out of the mixture. This took about five minutes at a good rate of simmer.

Step 4:  Remove from heat and let the onion/garlic/white wine mixture cool for about 5 minutes. During that time you can assemble the remaining ingredients

Step 5: One the mixture has cooled whisk in the remaining ingredients. My sauce had the consistency of lumpy ranch dressing. But man, did it taste better than any ranch dressing I’ve ever had. You could probably use this as a dip for other things besides a sauce for grilled chicken.

IMG_20120930_160403

Step 6: Cover and refrigerator for about 1 hour before serving. If grilling chicken, brush on the White BBQ sauce onto the pieces about 10 – 15 minutes before they are due to be pulled from the grill. I’ve included a shot of what the chicken will look like after cooking with the sauce in the pic below.

IMG_20120930_173043

Try it and let me know how it comes out.

Basil & Garlic Pork Tenderloins–Part I, the prep…

It is my firm opinion that every grill cook needs a supportive beverage. Preferably one with some alcohol in it. For this prep session I’ll be turning to an old favorite, Sam Adams Octoberfest.

Step 1: The Beer

IMG_20120922_191005

Step 2: Ingredients (Wet and Dry)

IMG_20120922_184403_small

This recipe is based upon a recipe from Adam Perry Lang’s BBQ25 cookbook. I revised it a bit using the fresh basil growing my garden in front of my house. There is nothing like using fresh herbs. Just bringing the basil in doors filled my downstairs with its smell. Here are the list of ingredients for the brine/marinade

Dry Ingredients Wet Ingredients
  • 3 tbsp kosher salt
  • 3 tbsp brown sugar (homemade)
  • 1 tsp blk pepper
  • 1 tsp Old Bay Seasoning
  • 1 tbsp onion powder
  • 1 tbsp dried crushed Aleppo Peppers (Williams-Sonoma
  • 1 bulb garlic
  • 1 bunch fresh basil
  • 6 cps cold water

Step 3: Making the Brine/Marinade

I guess this mixture is more a marinade than a straight brine. But  I guess it is functioning as a bit of both since it has kosher salt and brown sugar. Do yourself a favor and use fresh herbs and brown sugar. The payoff is worth it. After all, you will be eating this. In the picture below I’ve minced the garlic (peeled) and basil in my food processor. In the other container I’ve mixed the dry spices.

IMG_20120922_185536_small


Step 4: The tenderloins

My wife picked up this pack of pork tenderloins at our local Giant Supermarket. I was originally going to cook Bone-in Pork Loin Roasts, but these were on sale. As you can see, I was accommodating.

IMG_20120922_190406_small

Step 5 – Brining/Marinading

Here you see two tenderloins in a 1 Gallon ziploc freezer bag. I split the resultant mixture in half and poured it over the tenderloins in both bags. I plan on marinading these overnight and cooking them tomorrow. I’ll be back with the second half of this post after I cook these.

IMG_20120922_190709_small