Big Bald Ribs, 3/21/2015

20150321_191347

Lessons Learned

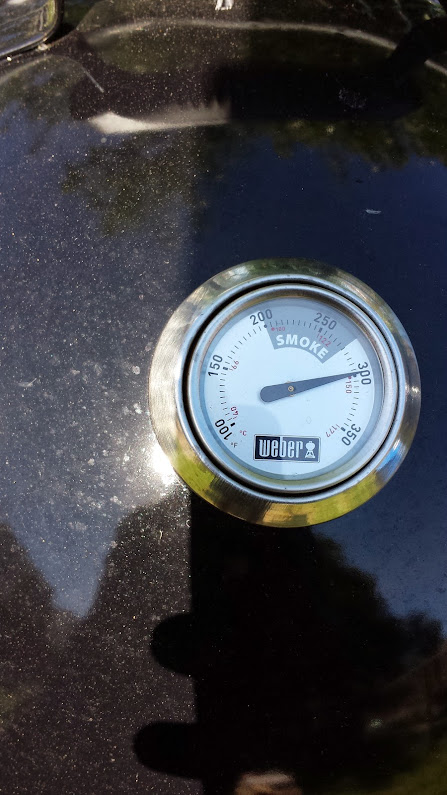
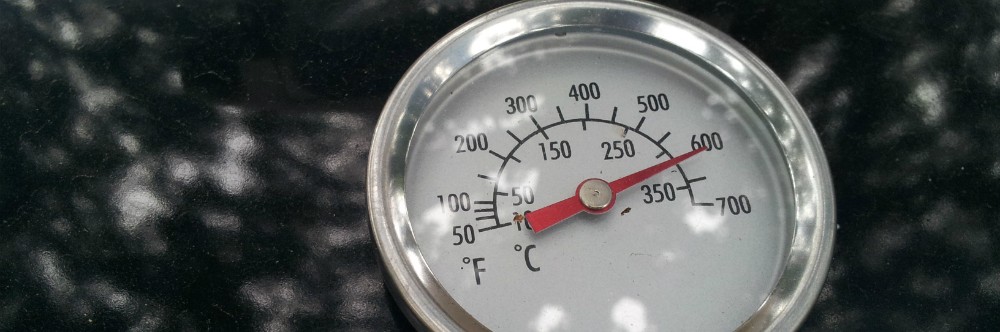
  • When cooking without water in the pan, the temps of the smoker come up quick.
  • Controlling temps with only the exhaust vent showed how leaky the WSM really is
  • There is an art to drafting the cooker to get clean smoke

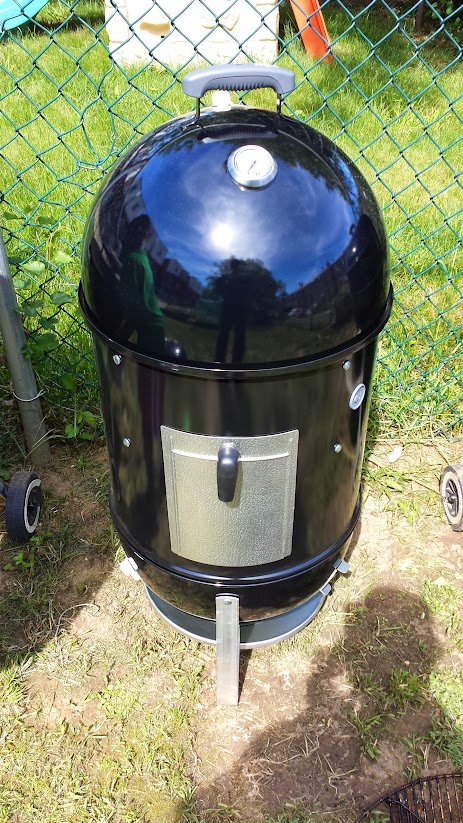
It was a busy week during my run-up to my  first Spring Cook. I finally got rid of an older Weber 22.5 grill. Prior to my WSM this was my primary rotisserie and smoking rig. Once I got the WSM proper, I stopped using this unit at all. It breaks my heart to see a Weber go unused. Hopefully it went to a good home and not picked up by some anonymous scrapper to turn into slag.

First day of Spring in Philly

first_day_of_spring

Thankfully there’s not much snow and ice on my smoker. Was able to clean it up the night before to get it ready for my first real smoke of the season.

You know the routine so here goes:

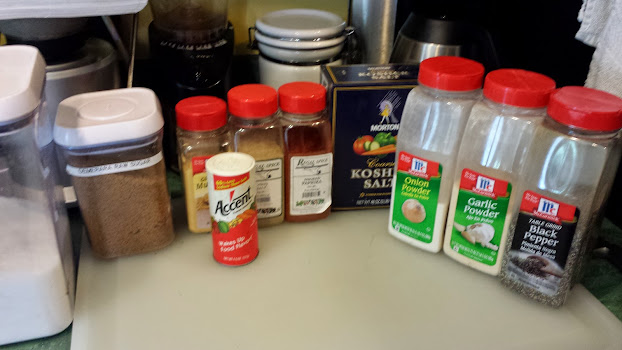
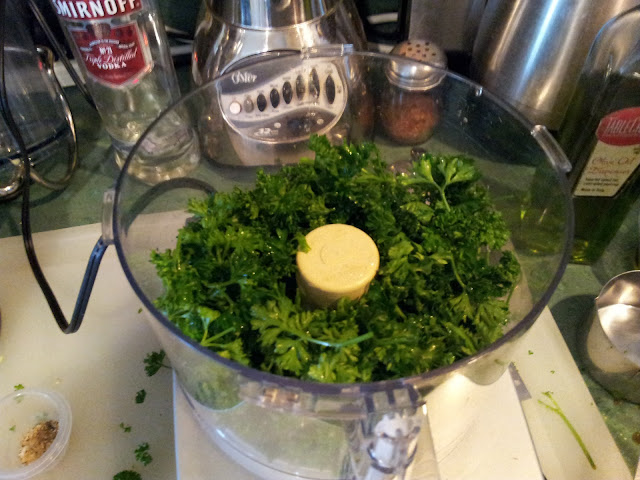
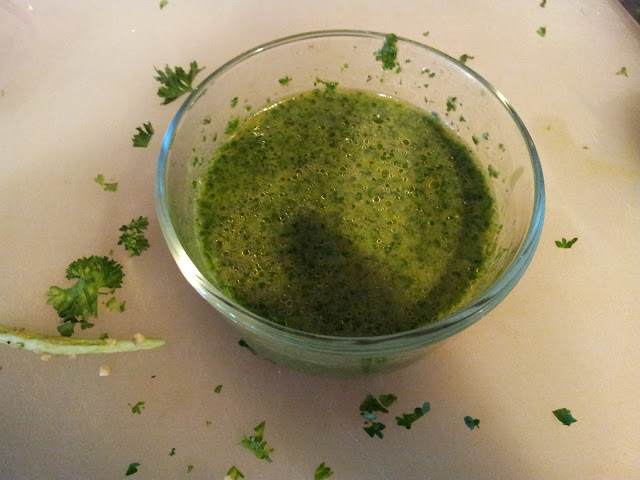
Mise en Place: The Rub
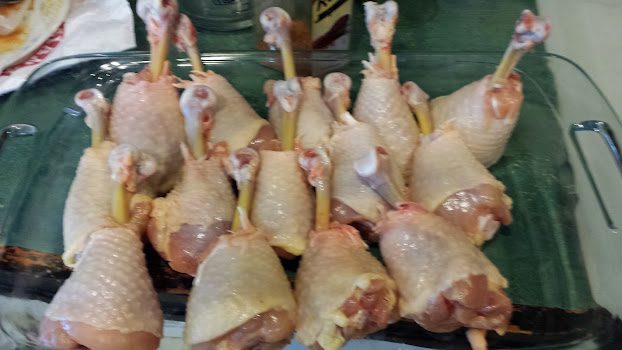
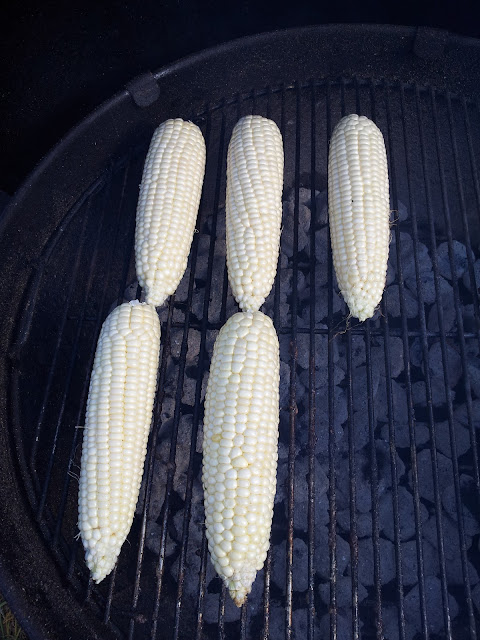
20150321_082412 20150321_083350

The Meat:

20150321_08402520150321_084546

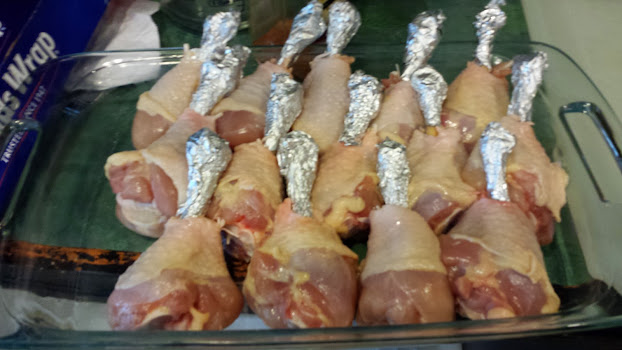
Putting on the mustard:

20150321_08505120150321_085058

Hary Soo

I’ve been reading alot about Harry Soo and his Competition winning team, Slap Yo Daddy BBQ. Harry is renowned for using only WSMs in his competition cooks and will beat teams with $15,000 computer controlled PIP systems. Which in turn gives me hope because all I use is a WSM in my backyard.

One thing Soo recommends is not controlling the WSM with the bottom dampers at all but to leave one open and control the cooker with the top only.  (Harry’s Article)

This goes in the face of everything you read about leaving the top wide open and using the bottom to control airflow. It sounds counter intuitive. You would think that you would be inviting bad tasting smoke to ruin your food. But the WSM un-modded is very leaky. The area around the door leaks, as does the lid and the top ring. So air is always entering and exiting the unit around these areas.

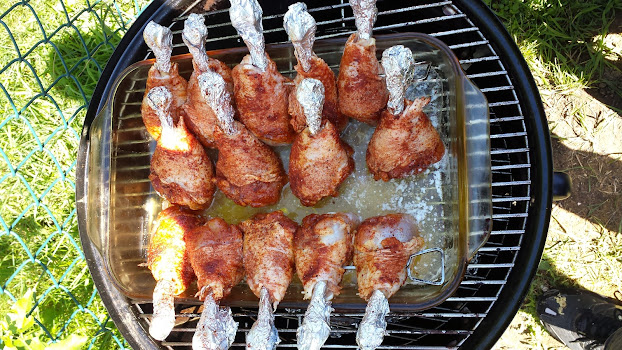
Another thing he recommends for new users is to use the WSM without filling the water pan, but foiling it twice instead.

This allows for easier clean up as there isn’t that nasty “bong water” left over after a smoke. I’ve read of some folks doing this, or filling their water pan with sand, or terra cotta plates to act as a heat sink. For me, having the water helped temper any rapid fluctuations with the temps because you have this huge amount of water absorbing any extra heat. Plus it added moisture to the smoking chamber. However now, the heat inside the smoker is dry and you need to compensate with spraying the meat once an hour to prevent it from over drying. But the bark formation is definitely more pronounced doing it without water in the pan.

20150321_125538


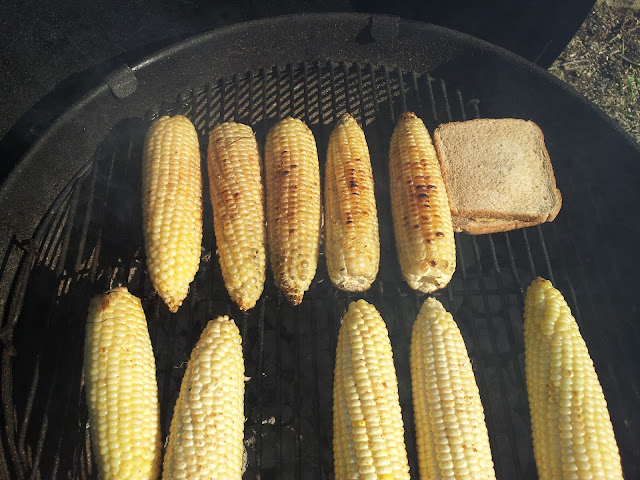
Pulling Meat at 3 hour mark for wrapping:

20150321_164202

20150321_164205

After 2 hours in the foil:

20150321_183332

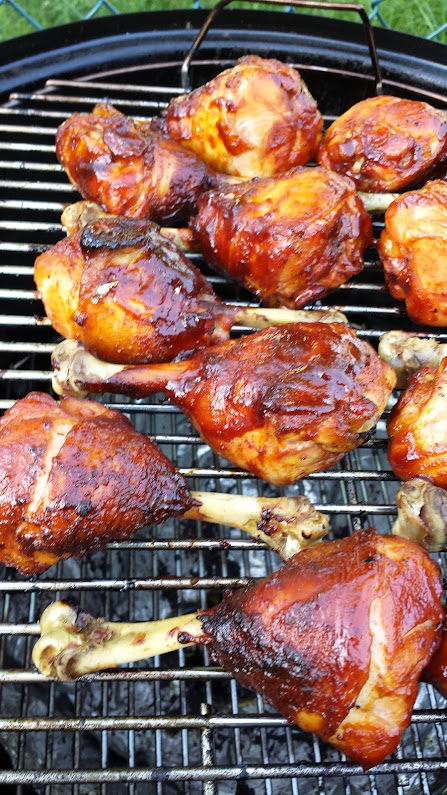
Sauced  and going back on for the last hour:

20150321_183809

Pulled for plating:

20150321_190814

Pulled Pork Shoulder

20140701_181704

Lessons I Learned:

  • Use a larger cut of meat (you lose10-15% weight after trimming)
  • The plateau is real! Trust your thermometer
  • Watch those temps! Continue to cook through to 190
  • Use all vents on the smoker not just the ones easily accessible

Skill Level: Intermediate

Cook Session:

I started with 2 smaller shoulders I picked up from the grocery store about 5 to 6lbs each. I saw a 10 lb shoulder and thought it was way too big. Forgot that once you trim the fat cap off you loose some weight. Otherwise the meat looked pretty decent. A nice red vs the pale pink you see of most commodity port

20140630_135935 20140630_140354

Next step was the trim the hide and fat cap off each shoulder and slather each with yellow mustard to give the rub something to hold on to.

20140630_141226 20140630_142606

I used the same rub as I did my spareribs during my last cook. I’ve been researching for some other rub recipes and found a really good on on amazingribs.com.

20140630_134719 20140630_135617

Rub recipe

  • 1/4 cp raw sugar
  • 1/4 cp kosher salt
  • 1/4 cp Paprika
  • 1 tbsp coarse black pepper
  • 1 tbsp granulated garlic
  • 1 tbsp onion powder
  • 1.5 tsp crushed chipotle pepper
  • 1/2 tsp. crushed Fennel seed (used mortal & pestle)

Here’s what they looked like after mustard and rub was applied. I then wrapped them and put them in the refrigerator over night.

20140630_14331520140630_143731

What will be different about this cook is that I will be trying out the Maverick 732 Remote BBQ Thermometer. This thermometer has probes for the smoker rack and the meat. You can set alarms for meat and smoker. Plus, I can check the temp from the comfort of my house or deck and not have to run to the backyard every 30 minutes. degrees. My target temp for this cook was 225 – 250 range.

You can see from the pics below how off my dome temperature was from the grill grate. The delta was anywhere from 25 to 50

20140701_070733  20140701_074635

Once the grill hit 225, I added both shoulders to the top rack and went back to minding the temps. The Thermometer really helped me gauge and get a feel for the temp profile a little better. I had no problems staying within my range. The WSM with a water pan, is excellent at staying in the 250 – 275 range.

At about the 6 hour mark, the shoulders hit 165 and plateaued. I’d read about this before, on various sites. It is caused by the moisture coming off the meat and evaporating thus cooling off the meat. The meat stayed their for over 2 hours. I had to force myself not to look or mess with it. This is necessary to break down the collagen and connective tissue to make the shoulder tender. I had to literally tell myself that I was cooking to tenderness not doneness.

Once the pork hit 190, about 9 hours total cooking time, I wrapped them and let them rest for 30 minutes.

20140701_181357 20140701_181321

Once they were rested I pulled out my Bear Paws pulling tools and went to work. The big bones pulled straight out with no effort at all. Look at that smoke ring! I must have stood in the kitchen for 5 minutes just pulling and snacking before telling any body else it was ready.

20140630_152921 20140701_181826 20140701_181504

My family loved it!

Memphis Rubbed Lollipop Drumsticks

20140615_182143

Lessons Learned:

  • I need to sharpen my kitchen shears
  • Monitor temps on the smoker better
  • Next time I will dip the bone as well for a better sheen/presentation
  • Maybe invest in a drumstick holder for more uniform appearance

Skill Level: Beginner/Intermediate

I got this recipe from my man Malcolm at HowToBBQRight. If you want to take your BBQ to the next level, he’s got all kinds of videos, tips, tricks, etc. Pretty down to Earth guy too.

As always, I started by mixing my rub together. This is a standard recipe that I go to often. Mix it up real good. You can apply it with your hands or a good shaker bottle if you have one. I prefer sprinkling and rubbing it with my hands. And as I always say, “Rubbin’ Son, is Racing!”

Memphis Rub Recipe:

3/4 cup raw sugar
3/4 cup white sugar
1/2 cup smoked paprika
1/4 cup garlic powder
2 tbsp ground black pepper
2 tbsp ground ginger powder
2 tbsp onion powder

Skinning the legs:

With a sharp knife, cut down to the bone just under the knuckle end of the drumstick. Be sure to cut through the tendons and connective tissue to the bone. Once you are done you are going to pull the skin and cartilage up and over the knuckle. I found it easier to use a paper towel to grasp the skin and pull it off. Once done, push the meat down as far as you can toward the other end of the bone. When the chicken cooks, the meat is going to shrink down the bone and gather at the meaty end. Here is where having dull kitchen shears made the job of snipping the tendon so frustrating. I ended up going with my large Chef’s knife to get the job done.


Skinned and ready for wrapping:

Here is a shot of all the legs with the skin and cartilage pulled off ready for wrapping.


Bone ends wrapped…

One of Malcolm’s tips is to wrap the bone ends in aluminum foil. This keeps the bones from turning black from the smoke and heat. This is for cosmetic purposes only. I’m sure they would taste fine without it. I just took a small piece of aluminum foil and wrapped the ends prior to applying the rub.


Wrapped, rubbed, and going on…

Here’s a shot of them going only the smoker. I didn’t have a drumstick holder and my pan was a bit too large to get them to stand vertical without some help. So I used some skewers and threaded it through the drumsticks. I melted a stick of butter in the bottom of the pan to give the drumsticks additional flavor during the smoke.


Smoke/Roasting at 300 degrees for 2 hours…

One of the reasons I love my Weber is that it will hold steady without any help. IF YOU KEEP AN EYE ON IT! I used one Weber Chimney of lit Kingsford coals, and another half of unlit on top. Since I was shooting for a cook in the 2.5 hour range I wanted to make sure I had enough heat. I lined the water pan but did not fill it. Although you can’t see it in the above picture, I have a rack of bratwurst on for my boys as well. I added 1 block of Cherry wood per hour to the cooker to keep a steady smoke but not too overpowering. Once the smoker approached 275, I closed two bottom vents and left one open 100%. As always I left the top vent open 100%. I checked the temp every 30 minutes. First hour I was fine, Second hour temps begin to drop too fast and I had to open all the bottom vents to 100% to recover. Ten minutes later the temp was back where it needed to be. I’ve since ordered the Maverick 732 Remote BBQ thermometers to help me keep a better eye on temps when I’m inside the house.


Putting on sauce at 2 hour mark…

At 2 hours the legs were ready for the sauce. I brushed them with a 50/50 mixture of Sweet Baby Ray’s and Honey. After giving them a good coat, I put them back on for 30 minutes to tighten up the glaze a bit and let it caramelize. This is a shot after 30 minutes of glazing. Overall a good cook, and the family enjoyed them. So if my boys will eat it, it has to be good!

Cherry Smoked 3-2-1 RIBS!!!

20140605_192132

I figured for my first real cook in my smoker I had to go with ribs. I used my favorite method, 3-2-1. Three hours cooking unwrapped, 2 hours wrapped, then 1 hour unwrapped. This is the usual method I would do when trying to cook ribs on my 22.5” Weber One Touch Gold. Overall they came out pretty good

Lessons learned:

  • Start out with slightly more fuel (after 6 hours smoker was at 200 versus 250)
  • Use deeper cutting board to handle the juices better when unwrapping the ribs

Meat and Material

20140605_124313 20140605_125635

20140605_130722 20140605_131930

I went with three racks of spares from my local grocer. I trimmed them St. Louis Style and kept the ends and tips to smoke on the middle grate. I used a Cinnamon Cumin rub recipe from virtualweberbullet.com

Cinnamon/Cumin Rub Recipe:


1/4 cup granulated sugar
2 Tablespoons garlic salt
2 Tablespoons celery salt
2 Tablespoons paprika
1-1/2 teaspoons chili powder
1-1/2 teaspoons black pepper, freshly ground
1/4 teaspoon cinnamon
1/4 teaspoon cumin
1/4 teaspoon dry mustard

Lighting up

Judging the amount of charcoal is a bit art and science. I still had some leftover unspent coals from the inaugural session with thighs and brats. I probably could have used a bit more “full” coals as I’m sure those didn’t last long once the coals burned down. Used 3 fist sized chunks of Cherry wood

Rackin’ up

20140605_135623 20140605_135826

I managed to get 3 racks of spares on the top grate by curving them inside of my rib rack. I had to search in my garage to find the thing as it’s been so long since I’ve used it. In theory I could probably smoke 6 spares at a time on my WSM. You gotta make sure there is some room for the air/smoke to hit both sides of the racks. Remember to leave space.

Spraying ‘em up

20140605_160301

Every hour I spray the ribs with apple juice. For this session I just used some generic store bought apple juice. Maybe next time I’ll go with some premium juice. Still trying to break in my smoker. I bought the sprayer at a local restaurant store.

1 – 3 hours

1 hour mark
20140605_150212
2 hour mark
20140605_160230
Spraying ‘em at 3 hours
20140605_165842
Dusting/drizzling with brown sugar and honey
20140605_165932
Wrapping ‘em up
20140605_165939
Going back on for hours 4-5
20140605_170437

Here’s how they looked each hour of the cook. My little “helper” came outside to see what Daddy was up to. After spraying them I pulled them and gave them a sprinkling of brown sugar and drizzled honey. Then they got wrapped with aluminum foil and then placed on the smoker for 2 hours.

After 5 hours/ (Unwrapping)

20140605_190449

Here’s what they looked like unwrapping. They are almost ready. In retrospect, I should probably trim about 30 mins off each of the stages. But as I get to know my WSM I’m sure I’ll be able to dial it in. My poor cutting board was swimming in juices! Might mock up a cutting board with a drain hole to collect these.

Pulling and Plating them up

20140605_190453  20140605_192125 20140605_192439

Here’s what they looked like after 30 minutes of being kissed by smoke. Since they were so tender, I only left them uncovered for 30 minutes instead of 1 hour. Not too bad of a smoke ring on the board. Half a rack never even made it into the house! Sacrificed for BBQ Science!

Happy Anniversary to me!

Newest member of the family!


This year for my anniversary, I got an 18″ Weber Smokey Mountain Smoker. I’ve been wanting one of these for years. Now I can really try my hand at some long smokes without the fiddling and coaxing I usually have to do with my 22.5″ Weber grill. Man I can’t wait to fire up some meat!

Apple Roasted Honey Drumsticks

IMG_20130912_140752

After the less than stellar outcome with the Butterflied Turkey I wanted to do something easy with this cook. So I figured I would go back to a basic, drumsticks. I recently bought a new grill cookbook, Myron Mixon’s Everyday Barbeque and was dying to try the brine recipe in it.

Lessons Learned:

  1. These could have been fine smoke roasted in the 325-350 range. They didn’t need to have the slow and low treatment that a roast would need.
  2. A continuous supply of Apple chips was the perfect amount of smoke.

IMG_20130912_090133IMG_20130912_090125

Brine: I used Myron Mixon’s apple juice brine, and brined the drumsticks overnight.

Brine Recipe: (enough for 2 1 gallon freezer bags)
  • 6 cups apple juice
  • 2 cups apple cider vinegar
  • 1.5 cups sugar
  • 1.5 cups kosher salt

IMG_20130912_090430

Drumsticks fresh out of the brine and being toweled off…

IMG_20130912_091523

My favorite part, applying the rub…

Rub Recipe:
  • 1 cp. light brown sugar (packed)
  • 2 tbsp. chili powder
  • 2 tbsp. mustard powder
  • 2 tbsp. onion powder
  • 2 tbsp. garlic powder
  • 2 tsp. cayenne pepper
  • 2 tbsp. Kosher salt
  • 2 tbsp. black pepper

IMG_20130912_091816

Drumsticks all rubbed up and resting. My kids, who don’t like anything with spice or flavor, actually requested some “blank” drumsticks. No rub, just smoke and sauce!

IMG_20130912_102703

For this cook I went for a slow and low setup with about 3 hours of fuel. I have a continuous ring of Apple chips on top of the coals. This should get me a nice steady stream of smoke but not too much to overpower the meat with a sooty taste.

IMG_20130912_130329

For the sauce I went with a straight 2:1 mixture of Sweet Baby Ray’s and Raw Honey. Heated and mixed together. I mixed this about 2 hours before using.

IMG_20130912_133545

This is what the Chicken looked at the 2 hour mark. You can see that the ring of coals and chips have burned through half of the fuel. The grill was in the solid 225-250 range. A bit lower than necessary for chicken. But since this was going to be a long smoke I had plenty of time and fuel.

IMG_20130912_133641

I went ahead and added some sauce on the drumsticks. And left them on for about 30 minutes more. I ended up not having to go the entire 3 hours at all. Temps on the drumsticks at saucing were at 160.

IMG_20130912_140752

Close up after applying sauce:

IMG_20130912_193055

I pulled the chicken off, gave another coating of sauce, and covered with foil and let sit for 30 minutes. These were so good, and fall off the bone soft! A couple didn’t even make it to the photo shoot. Sacrificed to Cook’s Privilege! The apple wood left a mild taste, more subtle than cherry. It was a great compliment to the brine!

Grilled Corn with Chimi-churri

I originally came across this recipe on Pinterest from the chubbyvegetarian blog. As soon as I saw it I had to give it try. I did and it came out wonderful and my family loved it!

Recipe and instructions:

Chimi Churri Sauce

  • 2 cups flat-leaf parsley (loosely packed)
  • 1 tsp. sherry vinegar
  • zest of one lime
  • 1 clove of garlic
  • 1 jalapeno (seeds removed)
  • pinch of sea salt
  • cracked black pepper
  • pinch of cane sugar
  • 1/4 cup olive oil

This cook was sponsored by: (You have to have some good music on as well!)

Step 1: Place all ingredients in food processor.


Step 2: Run food processor until everything is blended fine. Slowly add oil while food processor is running until the mixture is smooth.


Step 3: Shuck your corn and remove as much of the silk as possible. Sometimes running under cold water while pulling can help get rid of the most stubborn strands.


Step 4: Start a medium hot fire on your grill. 1 chimney’s worth of charcoal should be fine. After coals are ashed over, spread into a layer 1 coal thick. Place corn directly above the coals.


Step 5: Grill the corn directly over the hot coals for approx 5 – 10 minutes per side. When the kernels start to lightly brown it’s time to turn and rotate the corn. Make sure you don’t burn it.


Step 6: Once corn is nicely grilled all over, liberally brush on the Chimi Churri sauce. Goes perfect with a cold beer!

Blackened Tilapia

P1010530

I love Cajun food, particularly Blackened Redfish, but since I didn’t have any Redfish, I substituted Tilapia. I made these the same time as I made my Cedar Planked Lemon-Pepper Tilapia. As before, I had this bag of Tilapia just sitting in the freezer, so I figured I’d do something with it.

The raw materials…

I split the bag in half. I blackened 6 fillets and cedar planked the other 6.

P1010498

I used a variation of a recipe from Terry Thompson’s The New Cajun-Creole Cooking cookbook. Here is the recipe I used to “paint” the fillets.

Dry Ingredients “Wet Ingredients”
  • 1 tbsp. Paprika
  • 1.5 tsp. cayenne pepper
  • 1 tsp. kosher salt
  • 2 tsp. black pepper
  • 1 tbsp. dried thyme
  • 6 Tilapia fillets
  • 2 cups butter melted
  • 1/2 cup lemon juice (fresh squeezed, never the stuff from the plastic lemons, EVER!)

I melted the butter in the microwave on low heat, then stirred in all the rest of the ingredients and allowed the mixture to cool. Once cool I painted each fillet on both sides with the mixture and let it marinate for about 3 hours.

Painting the fillets…

P1010514

While the fillets were marinating I started a full chimney of Kingsford briquettes. I used half of the lit coals to fill a Weber basket, and the rest I spread in a single layer to toast cedar plank for the other fish I cooked.

Lighting the coals…

P1010492

Laying ‘em down…

I let the cast iron griddle heat for about 15 minutes over the weber basket. You’ll know when your griddle/skillet is ready, because the cast iron will get a bit of a gray haze on it.

As soon as you put the fillets on they will produce prodigious amounts of smoke. They will sear and begin to cook immediately. Be careful that the spits and sputters from the fish and butter don’t burn you. You may be tempted to lift the fillets or move them. DON’T! You will touch this only once, when you flip it over. It took these about 3 minutes per side.

P1010525

The finished product…

P1010530

These tasted as good as they look. One fillet never made it in the house. I brought out a fork and plate and ate it there at the grill.

Lessons Learned/For next time…

The Tilapia was a little too tender for this recipe. A couple of fillets got mangled in the turning. In addition, the weather was cold that day so I had to watch the heat on the second round of fillets. I can’t wait to try this with some Redfish or Red Snapper next time!

Cedar Planked Lemon-Pepper Tilapia

P1010531

I cooked these the same weekend I did the Smoke Roasted Round Roast. I had a bag of Tilapia that was taking up space in the freezer. Plus this fish cooks relatively fast. So I decided that I would blacken some, and then use up  my last cedar plank on these fillets.

A bit of courage…

This cook’s official sponsor was a Polish Mule. A great cocktail and easy to mix. 2 oz. Chopin Rye Vodka, juice of half a lime (freshly squeezed, not that green plastic grenade), two dashes of Angostura Bitters and 6 oz ginger beer over ice.

The funny thing about grilling in the middle of winter in Philly, when I take my drinks outside, they actually get colder!

P1010534

Step 1: Season…

These fillets got a simple dusting of equal parts kosher salt and ground black pepper. Nothing too complicated here, as the flavor is going to come from the wood and the lemons during the cook.

P1010522

Step 2: Gimme some heat…

I lit a full chimney of briquettes, filling one weber basket and then spreading the rest next to it. Below you see me toasting the cedar plank while cooking some blackened tilapia along side. It took about 5 minutes for the cedar plank to toast up nicely.

P1010524

Step 3: Laying on the fish…

After toasting the cedar plank, I flipped it, rubbed it with a bit of olive oil and laid the fillets on top. Then as you can see, I added 2 – 3 lemon slices on top of the fillets. Closed the lid and let it cook for about 10 minutes over a hot grill. The smell of the cedar and the blackening tilapia next to it, had my neighbor from down the street come down to see what I was cooking. That and it was 32 degrees outside!

P1010529

Step 4: Pulling the fish…

I ended up putting a third fillet on this plank, but the poor fillet never made it inside! He was sacrificed for the sake of cooking science.

P1010531

Results/Lessons Learned:

These fish came out very lemony. I guess this would work better with a fillet that had a more robust base flavor, like maybe Sword Fish or Sea Bass. One of the fillets was too lemony, the other two were great though. If I decide to plank these again in the future, I may just go for a spritz of lemon juice at the beginning and just be done with it.

But no worries I gave these a good home!

PG

Cherry Roasted Thighs and Brats

IMG_20130101_172726IMG_20130101_152809

It’s the first of the New Year and I had to create a bit of Summer. Right now it is 35 degrees, grey, and a bit dreary here in Philly. But that doesn’t have to stop me. Mind you, my wife and neighbors are sure I’m insane. Besides, its been a couple of months since I’ve been able to grill. Let’s see Hurricane Sandy, an unnamed storm, traveling to Detroit and Chicago for work,  a couple of bouts with some good chest colds, and voila!, There goes your time.

Official sponsor of today’s cook

IMG_20130101_141938

Winter in Philly…

IMG_20130101_134551

So as before, let’s get started with the players:

Dry ingredients for rub: Wet Ingredients:
3 tbsp Paprika
1 tsp Garlic salt
1 tsp Onion powder
t tsp Coarse black pepper
3 tbsp Brown sugar
Potato Rolls
Johnsonville Bratwurst
12 chicken thighs
2 tbsp EVOO

Since I only thought of barbequing this morning, I didn’t have time to brine the thighs, so I used this basic rub and let it sit for a couple of hours while I grilled some bratwurst and potato rolls. Also, I will do a complete slow and low cook without starting the chicken directly over the coals first. This way they get a chance to absorb as much of the cherry smoke as possible.

I rubbed the thighs with the EVOO first then liberally sprinkled and rubbed in the dry rub. The rub is very basic so go with as heavy as a hand you like.

IMG_20130101_142237

The temperature outside is a bit on the cold side, 35 degrees and about 10 mph wind. So I don’t have to worry about temps getting away from me at the beginning of today’s cook. I lit one full Weber chimney of coals that I split between a weber basket and the rest heaped against the other side of the kettle.

This allowed constant heat for the cast iron griddle for the onions, mushrooms, and green pepper, as seen below. I used a bit of smoked sea salt and dried porcini mushrooms while cooking the vegetables.

IMG_20130101_143552

After about 30 minutes:

IMG_20130101_151722

Best Potato Rolls in Philly!

IMG_20130101_140711

Toasting the potato rolls:

IMG_20130101_151958


PART II: Thighs

During the brats, the temperature of the kettle wavered between 350 and 300 degrees. About an hour into the cook I added 20 unlit briquettes on top of the burning coals and gave it ten minutes to catch. I poured out the basket onto the side as well as I wouldn’t be needing it for the chicken

At about 30 minutes later in I added in 15 additional unlit briquettes to ensure I had enough heat for the planned cook time of 1:45 minutes totals.

Final Pics of Thighs

IMG_20130101_172707

Thighs came off and were perfect. Meat fell off the bone. They went great with a 1:1 mix of Sweet Baby Ray’s and Srirachra Chili Sauce.