Pulled Pork Shoulder

20140701_181704

Lessons I Learned:

  • Use a larger cut of meat (you lose10-15% weight after trimming)
  • The plateau is real! Trust your thermometer
  • Watch those temps! Continue to cook through to 190
  • Use all vents on the smoker not just the ones easily accessible

Skill Level: Intermediate

Cook Session:

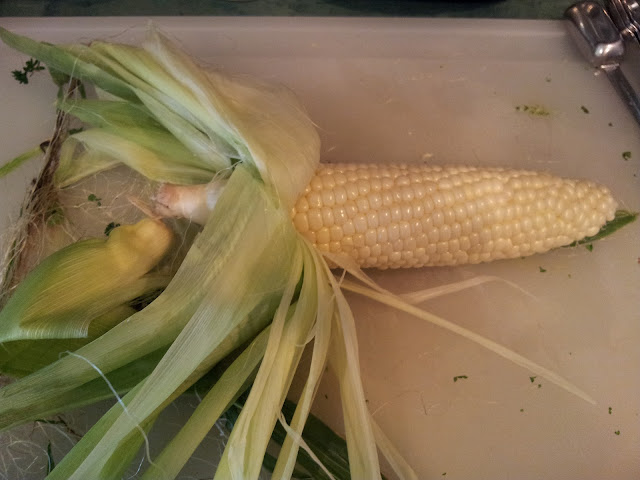
I started with 2 smaller shoulders I picked up from the grocery store about 5 to 6lbs each. I saw a 10 lb shoulder and thought it was way too big. Forgot that once you trim the fat cap off you loose some weight. Otherwise the meat looked pretty decent. A nice red vs the pale pink you see of most commodity port

20140630_135935 20140630_140354

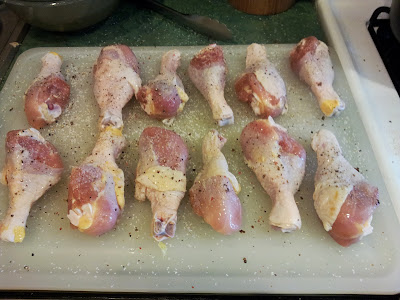
Next step was the trim the hide and fat cap off each shoulder and slather each with yellow mustard to give the rub something to hold on to.

20140630_141226 20140630_142606

I used the same rub as I did my spareribs during my last cook. I’ve been researching for some other rub recipes and found a really good on on amazingribs.com.

20140630_134719 20140630_135617

Rub recipe

  • 1/4 cp raw sugar
  • 1/4 cp kosher salt
  • 1/4 cp Paprika
  • 1 tbsp coarse black pepper
  • 1 tbsp granulated garlic
  • 1 tbsp onion powder
  • 1.5 tsp crushed chipotle pepper
  • 1/2 tsp. crushed Fennel seed (used mortal & pestle)

Here’s what they looked like after mustard and rub was applied. I then wrapped them and put them in the refrigerator over night.

20140630_14331520140630_143731

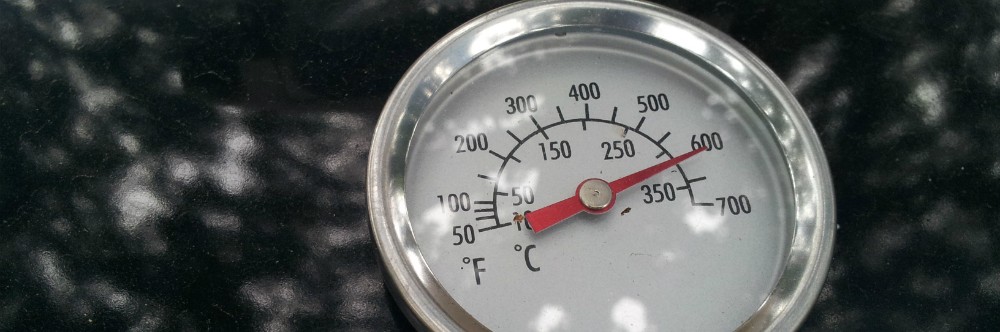
What will be different about this cook is that I will be trying out the Maverick 732 Remote BBQ Thermometer. This thermometer has probes for the smoker rack and the meat. You can set alarms for meat and smoker. Plus, I can check the temp from the comfort of my house or deck and not have to run to the backyard every 30 minutes. degrees. My target temp for this cook was 225 – 250 range.

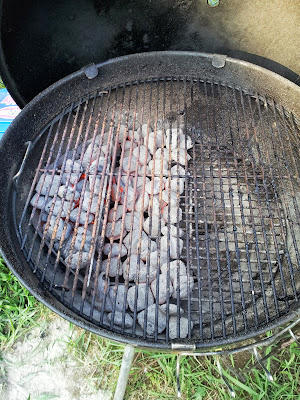
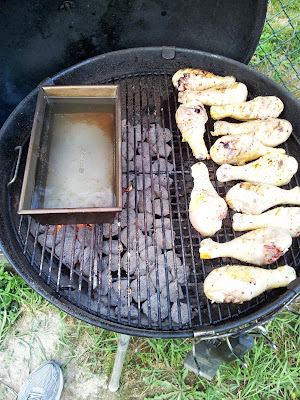
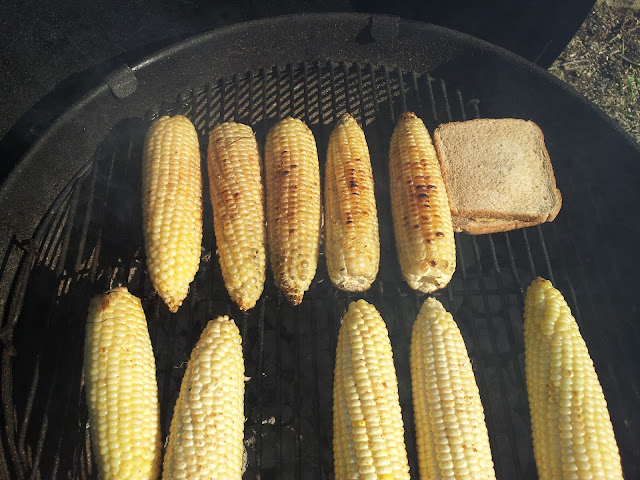
You can see from the pics below how off my dome temperature was from the grill grate. The delta was anywhere from 25 to 50

20140701_070733  20140701_074635

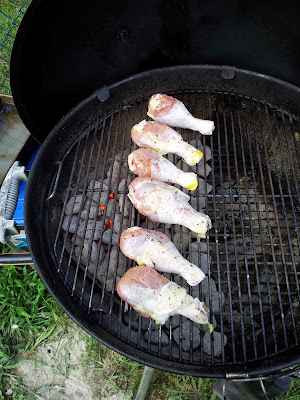
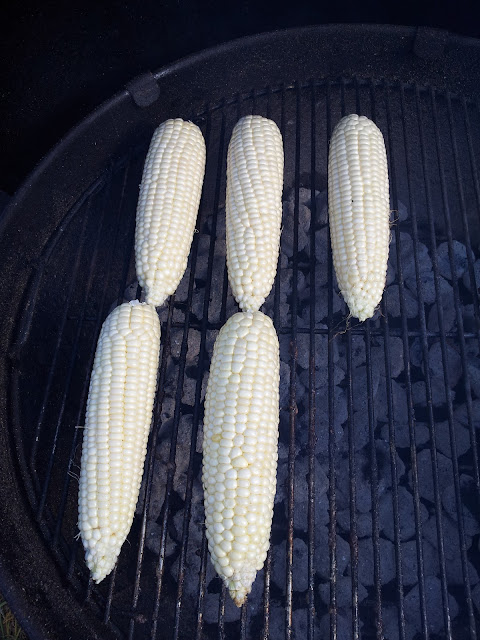
Once the grill hit 225, I added both shoulders to the top rack and went back to minding the temps. The Thermometer really helped me gauge and get a feel for the temp profile a little better. I had no problems staying within my range. The WSM with a water pan, is excellent at staying in the 250 – 275 range.

At about the 6 hour mark, the shoulders hit 165 and plateaued. I’d read about this before, on various sites. It is caused by the moisture coming off the meat and evaporating thus cooling off the meat. The meat stayed their for over 2 hours. I had to force myself not to look or mess with it. This is necessary to break down the collagen and connective tissue to make the shoulder tender. I had to literally tell myself that I was cooking to tenderness not doneness.

Once the pork hit 190, about 9 hours total cooking time, I wrapped them and let them rest for 30 minutes.

20140701_181357 20140701_181321

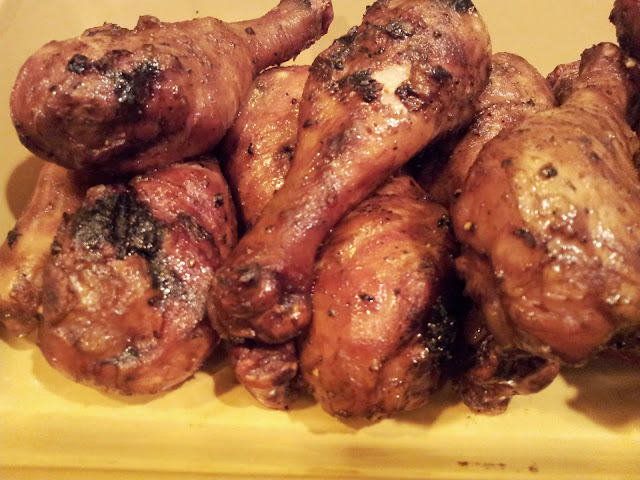
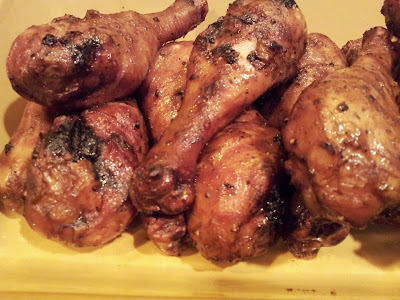
Once they were rested I pulled out my Bear Paws pulling tools and went to work. The big bones pulled straight out with no effort at all. Look at that smoke ring! I must have stood in the kitchen for 5 minutes just pulling and snacking before telling any body else it was ready.

20140630_152921 20140701_181826 20140701_181504

My family loved it!

Apple Roasted Honey Drumsticks

IMG_20130912_140752

After the less than stellar outcome with the Butterflied Turkey I wanted to do something easy with this cook. So I figured I would go back to a basic, drumsticks. I recently bought a new grill cookbook, Myron Mixon’s Everyday Barbeque and was dying to try the brine recipe in it.

Lessons Learned:

  1. These could have been fine smoke roasted in the 325-350 range. They didn’t need to have the slow and low treatment that a roast would need.
  2. A continuous supply of Apple chips was the perfect amount of smoke.

IMG_20130912_090133IMG_20130912_090125

Brine: I used Myron Mixon’s apple juice brine, and brined the drumsticks overnight.

Brine Recipe: (enough for 2 1 gallon freezer bags)
  • 6 cups apple juice
  • 2 cups apple cider vinegar
  • 1.5 cups sugar
  • 1.5 cups kosher salt

IMG_20130912_090430

Drumsticks fresh out of the brine and being toweled off…

IMG_20130912_091523

My favorite part, applying the rub…

Rub Recipe:
  • 1 cp. light brown sugar (packed)
  • 2 tbsp. chili powder
  • 2 tbsp. mustard powder
  • 2 tbsp. onion powder
  • 2 tbsp. garlic powder
  • 2 tsp. cayenne pepper
  • 2 tbsp. Kosher salt
  • 2 tbsp. black pepper

IMG_20130912_091816

Drumsticks all rubbed up and resting. My kids, who don’t like anything with spice or flavor, actually requested some “blank” drumsticks. No rub, just smoke and sauce!

IMG_20130912_102703

For this cook I went for a slow and low setup with about 3 hours of fuel. I have a continuous ring of Apple chips on top of the coals. This should get me a nice steady stream of smoke but not too much to overpower the meat with a sooty taste.

IMG_20130912_130329

For the sauce I went with a straight 2:1 mixture of Sweet Baby Ray’s and Raw Honey. Heated and mixed together. I mixed this about 2 hours before using.

IMG_20130912_133545

This is what the Chicken looked at the 2 hour mark. You can see that the ring of coals and chips have burned through half of the fuel. The grill was in the solid 225-250 range. A bit lower than necessary for chicken. But since this was going to be a long smoke I had plenty of time and fuel.

IMG_20130912_133641

I went ahead and added some sauce on the drumsticks. And left them on for about 30 minutes more. I ended up not having to go the entire 3 hours at all. Temps on the drumsticks at saucing were at 160.

IMG_20130912_140752

Close up after applying sauce:

IMG_20130912_193055

I pulled the chicken off, gave another coating of sauce, and covered with foil and let sit for 30 minutes. These were so good, and fall off the bone soft! A couple didn’t even make it to the photo shoot. Sacrificed to Cook’s Privilege! The apple wood left a mild taste, more subtle than cherry. It was a great compliment to the brine!

Hong Kong Chicken

I picked this recipe from Weber’s Charcoal Grilling: The Art of Cooking with Live Fire last week, because I wanted something on the grill, but didn’t feel like going out to the store to pick anything up. So I defrosted some chicken legs the night before and set to preparing this. This is a relatively quick recipe to prepare for. Total time from unwrapping thawed legs to plate was about 5.5 hours. The majority of that time (4 hours) was the brine time for the chicken legs.

Let’s move on to the cook!

Dry Ingredients Wet Ingredients

Seasoning Blend:

2 tsp. Kosher salt

1 tsp. fresh ground black pepper

Brine:
2 qts water
1/2 cp. Kosher salt
1/2 cp. sugar

Grill Sauce:
2 tbsp. Hoisin Sauce
2 tbsp. Cider Vinegar
1 tbsp. Dijon mustard
2 tsp. Soy sauce
2 tsp. grape seed oil
1/4 tsp. fresh ground black pepper

This cook, is brought to you by Bacardi White

Step 1: Brine the chicken for 4 hours in the brine mixture and place in the fridge.

Step 2: Remove chicken from brine, rinse off, and pat dry with paper towels. Then liberally season with seasoning blend.

Step 3:

Set up a medium heat grill. I used 3/4 of a Weber chimney full of Kingsford coals. I filled one Weber basket with lit coals, and then poured the rest to cover half the charcoal grate. (see below)

Step 4: Place chicken directly over coals for a 5 minute char to get the drumsticks started. (2.5 minutes on one side, then 2.5 minutes on the other)

Step 6: Move to cool side of grill

Step 7: After 20 minutes

Step 8: After 40 minutes

Step 9: At 40 minutes, apply sauce to chicken and put the lid to cook for an additional 20 minutes

Step 10: Last 20 minutes

Step 11: Pull and let rest for 15 minutes. I made some sautéed vegetables and brown rice with a Moscow Mule. Excellent! Chicken had a bit of heat to it, a little too much for the kids, but me and the wife loved it!

Grilled Corn with Chimi-churri

I originally came across this recipe on Pinterest from the chubbyvegetarian blog. As soon as I saw it I had to give it try. I did and it came out wonderful and my family loved it!

Recipe and instructions:

Chimi Churri Sauce

  • 2 cups flat-leaf parsley (loosely packed)
  • 1 tsp. sherry vinegar
  • zest of one lime
  • 1 clove of garlic
  • 1 jalapeno (seeds removed)
  • pinch of sea salt
  • cracked black pepper
  • pinch of cane sugar
  • 1/4 cup olive oil

This cook was sponsored by: (You have to have some good music on as well!)

Step 1: Place all ingredients in food processor.


Step 2: Run food processor until everything is blended fine. Slowly add oil while food processor is running until the mixture is smooth.


Step 3: Shuck your corn and remove as much of the silk as possible. Sometimes running under cold water while pulling can help get rid of the most stubborn strands.


Step 4: Start a medium hot fire on your grill. 1 chimney’s worth of charcoal should be fine. After coals are ashed over, spread into a layer 1 coal thick. Place corn directly above the coals.


Step 5: Grill the corn directly over the hot coals for approx 5 – 10 minutes per side. When the kernels start to lightly brown it’s time to turn and rotate the corn. Make sure you don’t burn it.


Step 6: Once corn is nicely grilled all over, liberally brush on the Chimi Churri sauce. Goes perfect with a cold beer!

White Barbeque Sauce

I’ve been wanting to try my hand at “White Barbeque Sauce” ever since I first saw it in featured in Jamie Purviance’s cookbook Charcoal Grilling: the Art of Cooking with Live Fire. The recipe is pretty straight forward. And of course I’ve modified it a bit. Here are the players:

The Dry The Wet
  • 1 tbsp. sugar
  • 1 tsp. Sea Salt
  • 1 tsp. coarsely ground black pepper
  • Large Yellow Onion
  • 2 garlic cloves
  • 4 tbsp. unsalted butter
  • 1/2 cup dry white wine
  • 1 cup Miracle Whip Dressing
  • 1/3 cup loosely packed, rough chop basil
  • 1/4 cup Apple Cider vinegar
  • 2 tbsp. lemon juice
  • 1 tbsp. Dijon mustard
  • 1/2 tsp. hot sauce

IMG_20120930_151526

Step 1: Here I’ve minced the garlic & onion until they were basically a paste. I ended up straining this mixture as there seemed to be a lot of liquid left over. Since I was going to be sautéing this mixture I didn’t want it too wet.

IMG_20120930_152240

Step 2: In this shot, I’ve melted the butter and have begun to cook the onion mixture. It took about 4 minutes. I cooked it until it was just starting to turn opaque; stirring occasionally.

IMG_20120930_154609

Step 3: Next I added in the white wine and cooked until half of the liquid evaporated out of the mixture. This took about five minutes at a good rate of simmer.

Step 4:  Remove from heat and let the onion/garlic/white wine mixture cool for about 5 minutes. During that time you can assemble the remaining ingredients

Step 5: One the mixture has cooled whisk in the remaining ingredients. My sauce had the consistency of lumpy ranch dressing. But man, did it taste better than any ranch dressing I’ve ever had. You could probably use this as a dip for other things besides a sauce for grilled chicken.

IMG_20120930_160403

Step 6: Cover and refrigerator for about 1 hour before serving. If grilling chicken, brush on the White BBQ sauce onto the pieces about 10 – 15 minutes before they are due to be pulled from the grill. I’ve included a shot of what the chicken will look like after cooking with the sauce in the pic below.

IMG_20120930_173043

Try it and let me know how it comes out.

Butterflied Smoked Chicken

For this cook, I am started with a standard Perdue fryer. I need to find a good Amish butcher so I can get some organic free range birds to play around with. My local grocer stopped selling organic Kosher so I have been using Perdue birds.

IMG_20120901_213159

Here you see I’ve cut through the back of the chicken to one side of the backbone. When I butterfly I usually leave the backbone in, vs cutting it out. There is some decent flavor that gets missed when you pull the backbone out.

IMG_20120901_213443

Here the bird is flipped over and you can see where I left in the backbone on the left side. Next step is removing the keel. Which I will show in the next shot.

IMG_20120901_213511

After spreading the two halves of the bird, I position a sharp chef’s knife against the upper edge of the keel as in below. Using a slight cutting motion the blade will cut a small indentation into the bone. Once done, spread the bird with slight pressure and the breastbone will split. Then run your finger along the underside and pull the whole thing out in one shot.

IMG_20120901_213534

Here is a picture of the bird after the center breast bone has been pulled out.

IMG_20120901_213723

I flipped the bird over and cut two small slits in the lower part of the breast halves to tuck the drumsticks in as in the below picture. I season with rub with the drumsticks untucked then tuck them back in before I place on the grill.

IMG_20120901_213848

Applying some rub. My basic recipe is as follows:

Wet Ingredients Dry Ingredients
  • Rinse bird with water (dry with paper towels)
  • sprinkle with 2 tbsp lemon juice lightly rub all over bird
  • 4 tbsp kosher salt
  • 2 tbsp paprika
  • 2 tsp dried chipotle pepper
  • 2 tsp brown sugar
  • 2 tsp garlic powder
  • 1 tsp celery seed
  • 1 tsp ground cumin
  • 1 tsp black pepper

IMG_20120901_214324

Going on the grill with some spare thighs I had leftover from an earlier cook.

IMG_20120902_162250

Not too bad if I do say so myself. I pulled the thighs off earlier than the butterflied bird as they were finished sooner.

IMG_20120902_182659

Basil & Garlic Pork Tenderloins–Part I, the prep…

It is my firm opinion that every grill cook needs a supportive beverage. Preferably one with some alcohol in it. For this prep session I’ll be turning to an old favorite, Sam Adams Octoberfest.

Step 1: The Beer

IMG_20120922_191005

Step 2: Ingredients (Wet and Dry)

IMG_20120922_184403_small

This recipe is based upon a recipe from Adam Perry Lang’s BBQ25 cookbook. I revised it a bit using the fresh basil growing my garden in front of my house. There is nothing like using fresh herbs. Just bringing the basil in doors filled my downstairs with its smell. Here are the list of ingredients for the brine/marinade

Dry Ingredients Wet Ingredients
  • 3 tbsp kosher salt
  • 3 tbsp brown sugar (homemade)
  • 1 tsp blk pepper
  • 1 tsp Old Bay Seasoning
  • 1 tbsp onion powder
  • 1 tbsp dried crushed Aleppo Peppers (Williams-Sonoma
  • 1 bulb garlic
  • 1 bunch fresh basil
  • 6 cps cold water

Step 3: Making the Brine/Marinade

I guess this mixture is more a marinade than a straight brine. But  I guess it is functioning as a bit of both since it has kosher salt and brown sugar. Do yourself a favor and use fresh herbs and brown sugar. The payoff is worth it. After all, you will be eating this. In the picture below I’ve minced the garlic (peeled) and basil in my food processor. In the other container I’ve mixed the dry spices.

IMG_20120922_185536_small


Step 4: The tenderloins

My wife picked up this pack of pork tenderloins at our local Giant Supermarket. I was originally going to cook Bone-in Pork Loin Roasts, but these were on sale. As you can see, I was accommodating.

IMG_20120922_190406_small

Step 5 – Brining/Marinading

Here you see two tenderloins in a 1 Gallon ziploc freezer bag. I split the resultant mixture in half and poured it over the tenderloins in both bags. I plan on marinading these overnight and cooking them tomorrow. I’ll be back with the second half of this post after I cook these.

IMG_20120922_190709_small